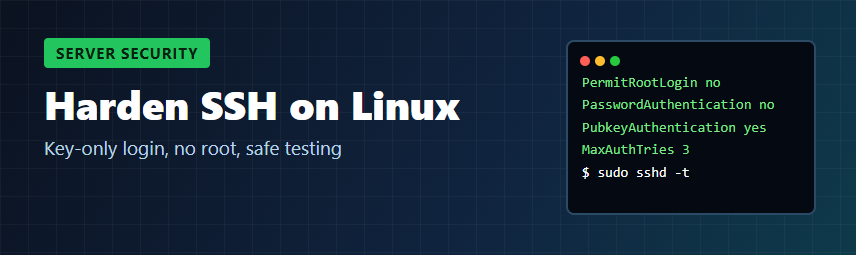
Any server with SSH open to the internet gets constant automated login attempts, many of them guessing passwords. The OpenSSH defaults are reasonable, but they still allow password logins. This guide shows a small set of changes that remove most of that risk: log in with keys only, keep root out, limit who can connect, and check that the server really uses your settings. It also shows how to make these changes without locking yourself out.
The commands below work on current Ubuntu and Debian releases. Notes for RHEL-family systems (Rocky Linux, AlmaLinux, Fedora) are included where they differ.
Before you start: do not lock yourself out
- Keep your current SSH session open for the whole process. Test every change from a second terminal.
- Make sure you have another way in, such as your hosting provider's web console or out-of-band access, in case something goes wrong.
- Check that a firewall or security group will not block you if you change anything network-related.
Step 1: Create a key pair and install it on the server
On your own computer (not the server), create an Ed25519 key. Protect it with a passphrase when prompted:
ssh-keygen -t ed25519 -C "you@workstation"Copy the public key to the server for your normal (non-root) user:
ssh-copy-id -i ~/.ssh/id_ed25519.pub [email protected]If ssh-copy-id is not available (for example on Windows), add the contents of id_ed25519.pub as a new line in ~/.ssh/authorized_keys on the server. Then set strict permissions. With the default StrictModes yes, sshd ignores keys whose files can be written by other users:
chmod 700 ~/.ssh
chmod 600 ~/.ssh/authorized_keys
Now open a new terminal and confirm that key login works before you disable passwords:
ssh -i ~/.ssh/id_ed25519 [email protected]Also confirm that this user can run sudo, because you are about to block direct root logins.
Step 2: Put your settings in a drop-in file
Recent Ubuntu and Debian releases include this line near the top of /etc/ssh/sshd_config:
Include /etc/ssh/sshd_config.d/*.confThis lets you keep your changes in a separate file that package updates will not overwrite. There is one important rule from the sshd_config manual: for each keyword, the first value sshd reads is the one it uses. Files from the Include are read in alphabetical order, at the point where the Include line appears.
This matters on cloud images. Some of them ship a file such as /etc/ssh/sshd_config.d/50-cloud-init.conf that contains PasswordAuthentication yes. If your file sorts after it, your setting is ignored. Use a name that sorts first:
sudo nano /etc/ssh/sshd_config.d/00-hardening.confIf your system has no Include line (check with grep -i '^Include' /etc/ssh/sshd_config), edit /etc/ssh/sshd_config directly. Make sure that each keyword appears only once and is not inside a Match block.
Step 3: The hardening settings
Add the following to 00-hardening.conf. Replace youruser with the account(s) that should be allowed to log in:
# Keys only
PubkeyAuthentication yes
PasswordAuthentication no
KbdInteractiveAuthentication no
PermitEmptyPasswords no

# No direct root login
PermitRootLogin no

# Only these accounts may log in over SSH
AllowUsers youruser

# Fewer guesses per connection, shorter time to authenticate
MaxAuthTries 3
LoginGraceTime 30

# Turn off features you do not use
X11Forwarding no
What each setting does, and the OpenSSH default for comparison:
| Setting | OpenSSH default | Recommended | Why |
|---|---|---|---|
PasswordAuthentication | yes | no | Stops password guessing completely. Only key holders can log in. |
KbdInteractiveAuthentication | yes | no | Keyboard-interactive (often through PAM) can still ask for a password even when PasswordAuthentication is off. Older configs call this ChallengeResponseAuthentication. |
PermitRootLogin | prohibit-password | no | Attackers always try root. Log in as a named user and use sudo, which also leaves a clearer audit trail. |
AllowUsers | (not set: all users) | your admin accounts | Service accounts and forgotten users cannot log in over SSH, even if they have a key or password. AllowGroups works the same way for groups. |
MaxAuthTries | 6 | 3 | Limits the attempts per connection. If you have many keys in your agent, see the troubleshooting note below. |
LoginGraceTime | 120 seconds | 30 seconds | Unauthenticated connections are closed sooner. |
X11Forwarding | no (Ubuntu's shipped config sets yes) | no | Most servers do not need graphical forwarding. |
Using PAM-based two-factor authentication? Then you need keyboard-interactive. Keep KbdInteractiveAuthentication yes and require both factors with AuthenticationMethods publickey,keyboard-interactive. Set up and test your 2FA module carefully first.
Step 4: Test the configuration before applying it
Check the syntax. If this prints nothing, the files are valid:
sudo sshd -tThen look at the effective settings, which sshd works out after reading every file:
sudo sshd -T | grep -Ei 'passwordauthentication|kbdinteractiveauthentication|permitrootlogin|allowusers|maxauthtries|logingracetime|x11forwarding'Expected output (keywords are shown in lowercase):
passwordauthentication no
kbdinteractiveauthentication no
permitrootlogin no
allowusers youruser
maxauthtries 3
logingracetime 30
x11forwarding no
If passwordauthentication still says yes, another file was read first. Find it with:
sudo grep -Rni 'passwordauthentication' /etc/ssh/sshd_config /etc/ssh/sshd_config.d/Step 5: Reload SSH and verify from a second terminal
Reload the service. Existing sessions stay connected:
# Ubuntu / Debian
sudo systemctl reload ssh

# RHEL, Rocky, AlmaLinux, Fedora
sudo systemctl reload sshd
Keep your original session open, then from a new terminal:
- Log in with your key. This should work.
- Try a password-only login. It should be refused with
Permission denied (publickey):ssh -o PubkeyAuthentication=no -o PreferredAuthentications=password [email protected] - Try
ssh [email protected]. It should be refused.
Close your original session only after all three checks pass.
Troubleshooting
- "Too many authentication failures" right away. Your SSH agent may offer several keys, and each one counts as a try against
MaxAuthTries. Tell the client which key to use:ssh -o IdentitiesOnly=yes -i ~/.ssh/id_ed25519 youruser@host, or addIdentitiesOnly yesto that host's entry in~/.ssh/config. - Key is refused even though it is in authorized_keys. Check the ownership and permissions of the home directory,
~/.sshandauthorized_keys. Read the server log withsudo journalctl -u ssh -n 50(use-u sshdon RHEL-family systems). - Password login still works. Run
sudo sshd -Tagain. A value that was read earlier, often from a cloud-init drop-in, is overriding yours. - Changing the SSH port. This is left out on purpose. Newer Ubuntu releases start SSH through systemd socket activation, so the listening port can be controlled by
ssh.socketrather than byPortalone. Follow your distribution's documentation, and open the new port in your firewall before you switch. A different port reduces log noise but does not replace key-only login.
Further steps
- Allow SSH in your host firewall or cloud security group only from the IP ranges you use, or reach it through a VPN or bastion host.
- A tool such as Fail2ban can block addresses that keep failing. With key-only login it mainly reduces noise, but it is still useful.
- Install security updates regularly so OpenSSH itself stays patched.
- Check
authorized_keyson every server from time to time, and remove keys belonging to people or machines that no longer need access.
Summary
Create and test a key, put your settings in a drop-in file that is read first, turn off password and keyboard-interactive login, block root, and list the allowed users. Check the result with sshd -t and sshd -T, reload, and test from a second terminal before you log out. These steps take about ten minutes and remove password guessing as a way into your server.
Sources
- OpenSSH manual pages: sshd_config(5), sshd(8), ssh-keygen(1)
- Ubuntu Server documentation: OpenSSH server